Kia ora Koutou
Today I have a very special Mother’s Day gatefold card to share with you made using the Amazing Paper Grace Die of the Month February 2019 – Enchantment Tall Flip and Gatefold Card Dies. What a stunning die this is and this is a companion to the Amazing Paper Grace Die of the Month December 2018 Softly Spoke’n Flip and Gatefold Dies in that these dies can be used to make gift baskets, boxes, gatefold cards and so much more. And I loved this colour combination of cream, rose gold and pink and felt that it was perfect for a very special elegant Mother’s Day card.
Dies were provided by Amazing Paper Grace for today’s creations.
My Project
For my project I have die cut two side panels out of cream pearl card using only the outline dies and the small triangular inserts on both sides. The left side I also die cut the small aperture out while on the right side I did not die cut the aperture out. I added an extra 1/2″ on one side of each panel which I scored along 1/2″. I added a small strip of pink pearl card behind the small decorative triangles and then folded over each side and adhered the two sides together.
Inside Back of Card
I cut a piece of cream cardstock 5″ x 7″ and glued the 1/2″ flap of the panels to each side of this card. I cut another piece of cream cardstock 5″ x 7″ and adhered it over the base hiding the strips. For the inside of the card I have cut a piece of cream pearl card 4 7/8″ x 6 7/8″ and added it to the inside back. I then cut a piece of rose pearl card 4 1/2″ x 6 1/2″ and added it to the inside back. I then added another piece of cream pearl card slightly smaller over the rose card. I die cut a rectangle out of rose gold card using the medium Amazing Paper Grace Hemstitch Rectangles Dies and cut another plain rectangle out of pink pearl card which was adhered behind the decorative rectangle. I die cut a medium rectangle using the Amazing Paper Grace Picot Petite Rectangle dies and added it to the front of the panel. I cut a small rectangle from the Hemstitch Rectangles die out of cream cardstock and adhered this to the front of the pink panel. I die cut two decorative panels from the Amazing Paper Grace Die of the Month February 2019 – Enchantment Tall Flip and Gatefold Card Dies out of the rose gold pearl card and trimmed them down to added behind the rectangle panel. These were all adhered to the inside back of the card. I die cut the sentiment from the Amazing Paper Grace Merry Everything Words Dies out of the rose gold pearl card and adhered it to the centre of the panel.
Front of Card
For the front of the card I die cut two large decorative panels out of rose gold cardstock and two shadow dies out of pink pearl card and added these together and adhered them to both sides of the card. I die cut an extra four ‘handles’ from the base die out of rose gold card and added them to the front and back of the panels for extra strength.
I stamped the sentiment from the Heartfelt Creations Occasion Sentiments Stamp Set on pink pearl cardstock in Wow Embossing ink and embossed it with Rose Gold Embossing Powder. This was then die cut using the small rectangle die and added to the right side of the card as shown.
I made a full bow out of pink and gold silk ribbon and adhered it to the bottom left of the card front.
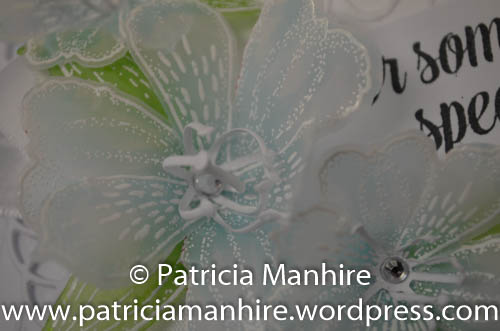
I die cut the flowers out from the Enchantment Tall Flip and Gatefold Card Die set out of flower shaping cardstock and coloured them with yellow and pink inks. These were then shaped and assembled using one of each size petal. I added a rose gold pearl to the centre of each flower and added a flower to the bow and three flowers to the top right side of the card.
I die cut the leaves from the Amazing Paper Grace Summer Label Motif Dies out of white cardstock and blended green ink to create realistic looking leaves. These leaves were added around the flowers as shown.
To finish I made a beautiful butterfly from the Summer Label Motif Dies out of pink, cream and rose gold pearl card and added it to the top right of the card.


Amazing Paper Grace Dies Used:
DOMAPG-FEB19 – Enchantment Tall Flip and Gatefold Card
Hemstitch Rectangles Dies S5-308
Picot Petite Rectangles Dies
Other Products Used:
Creative Expressions Pearl Card – Rose Glow
Rosies Studio Pearlised Cardstock – Cream
Close to My Heart Cardstock – Colonial White
Bazzill Rose Gold Cardstock
Rajni Chawla’s Flower Shaping Paper
Neenah Classic Crest
Heartfelt Creations All Occasions Sentiments
Wow Embossing Ink
Ranger Rose Gold Embossing Powder
Rose Gold Pearls from stash
Foam tape
Silk ribbon from my stash
My Sweet Petunia Precision Glue Press
Bearly Art Glue
Ranger Archival inks – Sunflower, Goldenrod, Pink Peony
Altenew inks – Aloe Vera, Matcha
Blending Brushes

Follow me on Facebook!
Follow me on Instagram!
Follow me on YouTube!
Happy Crafting
Patricia