Kia Ora and Welcome Back
Today I have a card purse that would be a fabulous Mother’s Day gift or a gift that would be great for those hard to get people.

Materials Used:
HCD1-7144 Decorative Medallion Die
HCD1-7170 Lush Lilac Die
HCPC-3816 Lush Lilac Cling Stamp
HCPC-3817 Lush Lilac & Umbrella Cling Stamp Set
HCD1-7171 Lush Lilac & Umbrella Die
HCFB1-466 Lush Lilac Paper Collection
HCFB1-466 Lush Lilac Mold
85-glitter Ultrafine Crystal Glitter
HCPP3-452 White cardstock
TSMP900 Tuxedo Black ink
RACP962 Ranger Archival Ink – Fern Green
486490 Bottle Cap Inc Vintage Magnets .5” 12 pkg
241159 Dove Blender pen
173842 Scor-Pal Measuring and Scoring Board
PGM15015 Rajni Chawla’s Crystal Clear
HCST1-401 Deluxe Shaping Kit
HCDA2-45 Stack and Store Daubers
ANC850 Spring Bling Prills
Other – Pearls, Brilliance Pearlescent Purple ink, Brilliance Pearlescent Lavender ink, small magnetic washer
For more tips on creating with the Lush Lilac collection, watch the tutorial at https://youtu.be/KDbdzC0MnAI
For more tips on creating with album & inserts, watch the tutorial at https://youtu.be/uThSFbPtnYE
For more tips on creating with the flower shaping molds, watch the tutorial at https://youtu.be/FSdPL7nXvQE.
Instructions:
Cut a piece of white cardstock at 10” x 5 ¼” and score at 4 ½” and 5 ¾” to create the base of the purse.

Adhere the magnet to the front of the card as shown. Cut a piece of patterned paper at 5 2/16” and 4 2/16” and adhere it over the front of the purse.


Cut two pieces of white cardstock at 4 ¼” x 4 ½” and score every ¾” along the 4 ½” side to create the sides.

Adhere these pieces to the sides of the purse as shown.

Cut a piece of white cardstock 4 ½” x 5 ¼” and score at 3/4” x 1 ¼” along the shorter edge to create the top. Using the edge die from the semi-circular medallion set die cut the edge of the top as shown.

Using the edge die cut from the Decorative Medallion die along the edge as shown.

Cut two strips of patterned paper 6/16” x 5 2/16” and ¾” x 5 2/16” and adhere at the top and front of the top. Die cut the edge and decorative dies out of white cardstock and adhere together before adhering to the front as shown.


Adhere top to the back of the purse.

Cut two strips of patterned paper 3/8” x 12” and adhere together to create the handle.

Score at 1” at each end and then adhere to the top as shown. Cut a piece of patterned paper at 3/8” x 5 2/16 and adhere over the top.


Take a small washer and place it over the magnet on the front. Add some glue on it and close the top over the purse. Lift the top and the glue will leave a mark on the back of the top. Adhere the washer over this mark with Dries Clear Glue.


Cut a piece of patterned paper 3” x 5 ¼”. Die cut the edge with the edge die from the Medallion set and then adhere to the back of the top as shown.


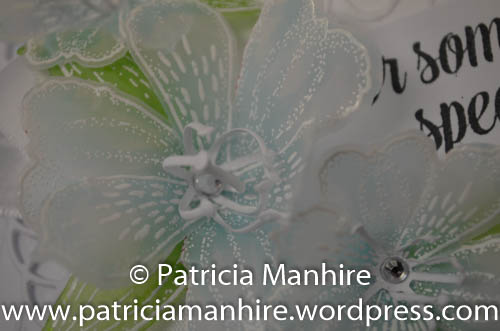
Stamp the image from HCPC-3817 Lush Lilac & Umbrella Cling Stamp Set in Tuxedo Black ink on white cardstock and die cut with the coordinating die. Sponge the leaves with Fern Green ink and colour the flowers with the Purple and Lavender inks using the Dove Blender pen. Add Ultrafine glitter to the image with the Dries Clear Glue, shape and adhere to the front of the purse.

Stamp the lilacs from the HCPC-3816 Lush Lilac Cling Stamp in Pearlescent Purple and Lavender inks, sponge with the coordinating inks, and die cut with the corresponding die. Shape the lilacs with the HCFB1-466 Lush Lilac Mold, allow to dry, shape and adhere the lilacs to lilac spray. Add Crystal Clear glitter to the lilacs with a damp sponge and add Lavender & Lace prills to the centres of the flowers with Dries Clear Glue.

To finish, add Ultrafine Crystal glitter to the images with Dries Clear glue. Add pearls on the handle.

These purses take 3 4 3/4″ x 3 3/4″ cards for ease for a lovely gift idea.
Here are some other purses I have made using different collections.

Have fun creating these purses.
Ka Kite Anu
Patricia