Thinking of You Classic Roses from Heartfelt Creations

Welcome back

Today I thought I would try and do something different with the Classic Rose stamp and die set from Heartfelt Creations.  Roses come in all shapes and sizes and this stamp and die set is just so great at making a wide range of flowers.

Materials Used:

Cardstock – Bazzill White Smooth, Timbrels White cardstock

Paper – Heartfelt Creations Wildwood Cottage

Stamps – Heartfelt Creations Classic Rose, Classic Rose Vine, Elegant Sentiments,

Dies Heartfelt Creations Classic Rose, Classic Rose Vine, Elegant Sentiments, Eyelet Oval, Decorative Oval, Classic Border Basics

Inks – Memento Tuxedo Black, Northern Pine, Bamboo Leaves, Rhubarb Stalk, Canteloupe, Brilliance Orchid

Heartfelt Creations Deluxe Shaping Kit

Art Glitter Dries Clear Adhesive

Foam tape

Sponge daubers

Instructions:

Cut a piece of white cardstock 6” x 12” and score along the long side at 6” to make a 6” x 6” card base.

Cut a piece of pink patterned paper 6” x 2 ½” and adhere to the bottom of the card base.  Cut a piece of white cardstock 6” x 5 ½” and using the lace edge of the border basics die cut the edge and adhere to the top of the card base over the pink patterned paper.

Die cut the outer eyelet oval in white cardstock.  Die cut the Decorative Oval and adhere to the eyelet oval.  Using foam tape adhere to the base card as shown.

To make the leaves stamp the images with Northern Pine.  Sponge the leaves with Bamboo Leaves and touch the ends of the leaves with Rhubarb Stalk.  Die cut the leaves and shape using the Deluxe Shaping Kit.  Adhere to the base of the oval with Art Glitter Dries Clear adhesive and foam strips.

To make the flowers stamp with Brilliance Orchid ink and sponge the centres with Canteloupe ink before die cutting out.  Sponge the edges with the Orchid ink both front and back of the flowers and sponge Canteloupe on the centres of the smallest flowers.  Shape the flowers using the Deluxe Shaping kit and put together using Art Glitter Dries Clear adhesive making different size flowers.  Adhere to the front of the card as shown.

Stamp the Thinking of You Sentiment in Tuxedo Black on white cardstock and die cut with the coordinating die.  Adhere to the top of the card with Art Glitter Dries Clear Adhesive.

Happy Crafting

Patricia
Blushing Roses for Mother

Welcome back

Mother’s Day is just around the corner in New Zealand and today I am featuring a card that I have made from the Blushing Rose collection from Heartfelt Creations.  I love the combination of purple and yellow and the Classic Rose flowers compliment the papers beautifully.

Materials used:

Cardstock – CTMH Colonial White, Timbrels White cardstock

Paper – Heartfelt Creations Blushing Rose, Vellum

Stamps – Heartfelt Creations Classic Rose, Classic Rose Vine, Everyday Hero

Dies – Heartfelt Creations Classic Rose, Classic Rose Vine, Everyday Hero, Luggage and Tags

Inks – Memento Tuxedo Black, Bamboo Leaves, Northern Pine,  Colorbox Wisteria, Frost White, Distress Ink – Dusky Concord

Ranger Embossing ink – White

Nuvo Crystal Drops – Lemincello

Heartfelt Creations Deluxe Shaping kit

Art Glitter Dries Clear Glue

Instructions:

Cut a piece of cream cardstock at 12” x 6”, score and crease at 6” along the long side to create a card base 6” x 6”.  Cut the 6” x 6” panel from the patterned papers, sponge around the edges with the Concord ink and adhere to the base card.

Die cut the two tags with the Luggage and Tags die, sponge the edges with Dusty Concord ink.  Place over the side of the postcard image on the paper using foam tape for some dimension.

To make the leaves stamp the images from the Classic Roses and Classic Rose Vine sets in Northern Pine.  Sponge with Bamboo Leaves before die cutting the images.  Shape the leaves for dimension and trim to place on the card across the front.

To make the roses stamp the images with Tuxedo ink and sponge in the centres with the Wisteria ink before die cutting the images.  Mist lightly on the back of the petals and shape using the Deluxe shaping kit.  Make up the roses in various sizes as shown and place on the leaves.  For further information on how to shape the flowers see Emma Lou’s video here:https://www.heartfeltcreations.us/video/129/how-to-create-dimensional-roses

Stamp the small images of the rose with Frost White ink on vellum and emboss with white embossing powder.  Die cut and shape lightly with the Deluxe Shaping kit.  Place around the roses as shown.  Add the Nuvo drops to the centre of the flowers

Stamp the sentiment from the Everyday Hero stamp in Tuxedo Black on the cream cardstock.  Using the arrow die from the Everyday Hero die cut the sentiment out.  Sponge on the edge with Dusty Concord ink and place on the card as shown with a small fold to the back of the card.

To finish, add a purple rose and vellum flower to the base of the sentiment as shown.

Until next time Happy Crafting

Patricia


I am All Glammed Up with Heartfelt Creations Easel Card

Welcome Back

Today I will be featuring a card made using a combination of the All Glammed Up paper collection combined with the Classic Roses from Heartfelt Creations.

20170210_185652

Here is the inside of the card:

2017-02-11-09-40-49

And here is a close up of the flowers:

2017-02-11-09-41-08

Materials used:

All Glammed Up Paper Collection

Black Heartfelt Creations cardstock

Stamps – Classic Rose

Dies – Heartfelt Creations Classic Rose, Regal Borders, Cut Mat Create 1A, Spellbinders Large Circles, Lacey Circles

Art Glitter Dries Clear Glue

Spectrum Noir Clear Sparkle Overlay

Foam tape

Pearls

Instructions:

Cut a base of 9” x 5 1/2” inch in black cardstock and score at 4 ½” and 6 ¾” and fold the end panel over to create the easel.  Fold into a Cut another two pieces of black cards stock 6” x 5 ½” for the fronts.  Using the edge die from the Regal Borders dies cut the edge from one side of the cards.  Cut two sheets of patterned paer 6” x 5 ½” and cut the lacy border edge from the Regal borders and adhere to the base card.  Place one on the top of the easel and the other on the base of the easel.  Finished measurement is 7” x 5”.

Cut out the panels from the All Glammed Up paper collection and mat onto black cardstock.  Die cut the circle image out of the panel using the Spellbinders circle die.  Adhere the lace to the card using Art Glitter Dries Clear adhesive.  Die cut a black lacy die from the Spellbinders Lacey Circles dies and mat the patterned circle image onto the die cut.  Adhere the image onto the back panel with foam tape for dimension.

For the base of the card die cut another image from a panel using the Cut Mat Create 1A die and mat it with black cardstock adhere it to the second panel.

To make the flowers stamp the Classic Rose stamps in a variety of sizes with Memento Tuxedo Black ink onto red cardstock.  Die cut out the shapes and sponge the edges with Rhubarb Stalk ink.  Using the Deluxe Shaping Kit shape the flowers and assemble them in the sizes you want.

Stamp the leaves from the Classic Rose set with Northern Pine and sponge with Bamboo Leaves before die cutting.  Shape the leaves using the Deluxe Shaping kit.

For the base I have added one larger rose and two smaller roses on the leaves either side to hold the easel in place.

Add the leaves and flowers as shown and finally add some pearls on the centre image.  Die cut the sentiment using the Luggage Tags and Labels set and sponge the edges with Rhubarb Stalk ink.  Adhere with sponge foam.

I have used Spectum Noir Clear Sparkle Overlay on the roses for a bit of shine and sparkle.

Have a good week and Happy Crafting

Patricia

Soft and Pretty Cards

Welcome Back

This week I am featuring a couple of cards made with vellum flowers using Heartfelt Creations Classic Rose stamp and die set.  I think this is my most used stamp and die set as it is really versatile with lots of different ways of making flowers.  And I am still going through my Sweet Lullaby papers and will be very sad when they are finished, but there are gorgeous new products coming all the time.

2017-01-06-18-02-06

2017-01-06-18-31-44

And here is the pink card open to show the depth of the card.

2017-01-06-18-30-38


This time I have had some fun using the Ranger Bridal Tinsel embossing powder.  This gives a lovely sparkly effect to your embossing and I had some fun making these flowers using the Heartfelt Creations Classic Rose flowers out of vellum.  I have used Memento Angel Pink and Summer Sky inks to colour the back of embossed flowers before die cutting them out.  These colours matched the Sweet Lullaby papers beautifully.  I have found that I prefer to do little shaping on the vellum to get the full effect of the beautiful stamps.

Here is a close up of the blue flowers.  They are so pretty.

20170106_180229

Materials used:

Cardstock – Bazzill smooth white cardstock

Paper – Sweet Lullaby

Stamps – Heartfelt Creations Classic Rose,

Dies – Heartfelt Creations Classic Rose, Cut Mat Create 1A, Regal Borders and Edges, Luggage and Labels,

Inks – Memento Teal Zeal,Summer Sky, Angel Pink, New Sprout, Bamboo Leaves

Sparkles from my stash

Have a good week and Happy Crafting

Patricia

Romantic Floral Wedding Cards

Welcome Back

What could be more romantic than getting married under a beautiful bower of flowers and I have made a couple of cards that would be perfect for such a wedding.

For these cards I have used the Heartfelt Creations Classic Roses along with the new Wildwood Florals from the just released Wildwood Cottage Collection to create a bower of flowers over the Happy Couple (die from Sue Wilson).  I can’t believe that I have never used Brilliance inks before but I have now decided they are just beautiful to make luscious flowers with a hint of sheen for a stunning effect.  All the flowers and the green leaf swirls have been cut from white cardstock and coloured with the Brilliance inks.  I did go over the top of the flowers with Spectrum Noir Clear Overlay for a sparkly effect which is hard to see in these photos.

20170124_151731-3

20170124_151712-3Materials used:

Cardstock – Timbrels, Bazzill Smooth White, Heartfelt Creations Black

Paper – Heartfelt Creations Wildwood Cottage Collection

Stamps – Heartfelt Creations Classic Rose, Wildwood Florals

Dies – Heartfelt Creations Classic Rose, Wildwood Florals, Botanic Window, Ornate Gateway, 1A, Cut Mat Create 2B,Cut Mat Create Sue Wilson Happy Couple, Spellbinders Majestic Labels Twenty-Five, Card Creator 5″ x 7″ A

Embossing Folders – Couture Creations Baroque

Inks – Brilliance Lime, Orchid, Purple, Galaxy Gold, Memento Canteloupe

Spectrum Noir Clear Overlay

Small sparkles from my stash

I hope that you have enjoyed these cards as much as I have had making them.

Have a good week and Happy Crafting.

Patricia

Romantic Triple Easel Wedding Card

Welcome Back

I have been meaning to do this triple easel card for sometime as it has intrigued me in how it was done.  I got very good instructions on how to make a triple easel card from Creative Expressions and this is my version of the card.  I can’t find the original post but here is another post with a triple easel card featuring different dies here.  It will give you the general idea about constructing a triple easel card.

20170113_184447-1-2

The original easel card just featured the Fleur de Lis Squares from Spellbinders but I decided to use the Labels 22 from Spellbinders more prominently and was happy with the result as the card was much stronger as well.  Of course I had to put some flowers on the card and the vellum flowers from the Heartfelt Creations Classic Rose stamp and die set was perfect for the soft romantic finish to the card.

I have used Bridal Tinsel embossing powder on vellum for a sparkly effect and it paired up well with the Angel Pink ink from Memento for just the softest of romantic touches to the white card.  The pearls on the Tied Together embossing folder from Couture Creations just finished off the card.  It is a small card and when folded up should fit in a standard A2 envelope and should be reasonably easy to post.

Here are the side views of the card:

20170113_184420-2

20170113_184407-2

Materials used:

Cardstock – Timbrels White Cardstock

Vellum

Stamps – CTMH Just Sayin’ Heartfelt Creations Classic Rose

Dies – Heartfelt Creations Classic Rose, Spellbinders Fleur de Lis Squares, Labels 22, Fancy Frames Tags Two

Inks – Colorbox Frost White, Versamark, Memento Angel Pink, Bamboo Leaves

Embossing Powder – Ranger White, Bridal Tinsel, Stampendous Aged Ivory

Embossing Folder – Couture Creations Tied Together

Pearls from my stash.

This card, along with most of my other creations are available for sale at Gift Hutt.

Have a good week and Happy Crafting.

Patricia


Cream and Gold Elegant Cards

Happy New Year

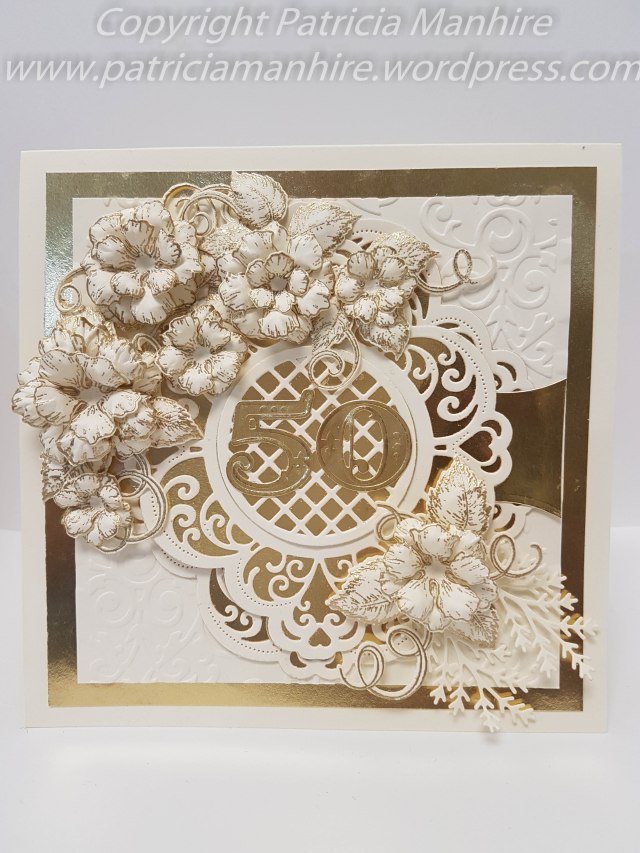
Today I am featuring some cards that I have just made.  I know that foil card has been around for a while, but I have only just discovered it and I LOVE the effects and contrasts you can get with it.  I love the elegance combining gold and cream and they work well with a 50th anniversary card.   And of course I had to use the Heartfelt Creations Classic Rose stamp and die sets to add the flowers and embellishments.

This  first card has been inspired by Jeannie Donnolly I had seen on Pinterest.

20170102_073834

I find it difficult making two cards the same and this one is no exception.  I had actually cut one of the Maggie dies incorrectly but ended up layering the dies under the main die image and used the Classic Border Basics cutting die from Heartfelt Creations to cut a strip to cover the gap and I was happy how it turned out.20170101_184549

The Gold Majestic Circle die from Spellbinders is a very interesting die with lots of lovely embossed textures on it and once again it is lovely for numbers for a milestone card.

20170104_152624

Finally, here is a card that I made that has no sentiment for any occasion but I think it looks very elegant for a special occasion.  I often get requests for plain unadorned cards.

20170102_122026

Materials used:

Cardstock – CTMH Colonial White, Gold Foil Cardstock

Stamps – Heartfelt Creations Classic Rose, Classic Rose Vine

Dies Heartfelt Creations Classic Rose, Classic Rose Vine, Classic Border Basics, Sue Wilson Lattice Frames, Maggie, Pine Leaf, Spellbinders Floral Oval, Stitched Oval, Victorian Numbers, Gold Majestic Circles

Embossing Folder – Couture Creations Baroque

Embossing Powder – Ranger Gold

Ink – Versamark

Button, glitter gems and ribbon from my stash

I hope you have enjoyed my cards and I look forward to posting more cards that I have made.

Have a good week and Happy Crafting.

Patricia

Welcome back

I have just received the new Border Basics die set from Heartfelt Creations along with their new fold out cards and I think the dies are beautiful and will add a new dimension to my paper crafting.  There are so many things you can do with them and here are my first efforts.

First up is a fold out card featuring paper from the Cut Mat Create Collection which is no longer available unfortunately,  However, I had a lot of fun with the papers and also adding the glitter to the flowers.  
20161217_164444-2

Here is the inside of the card:

20161217_164550_001-2

20161217_164531-2

20161217_164515-2

20161217_164520-2

My next card:

20161217_164702-2

With this card I ended up gluing the folds together to make a single fold card but it still came together well.  Here is the inside of the card.

20161217_164726-2

For this next card I have used one of the inserts from the Flip Fold Albums – Insert B

This made a lovely pop up card and featured the border dies very nicely.

20161217_164610-2

And finally here is a very simple but elegant card using the Classic Border Basics dies and a single rose from the Classic Rose set.

edited_1481409075703

These cards were quite fiddly but so worth it with the end results.  I hope you enjoy them.

Materials used:

Cardstock – Timbrels, CTMH Colonial White, Fern

Paper – Heartfelt Creations Cut Mat Create

Stamps – Heartfelt Creations Arianna Blooms, Classic Rose, Birds and Blooms, Open Leaf, CTMH Framed, Just Sayin’

Dies – Heartfelt Creations Fleur Borders and Corners, Arianna Blooms, Classic Rose, Birds and Blooms Leafy Branch, Classic Leaf, Elegant Border Basics, Fleur Border Basics, Classic Border Basics, Delicate Border Basics, Cut Mat Create 1A, Spellbinders Decorative Labels 8,

Inks – Bamboo Leaves, Pistachio, Lilac Posies, New Sprout, Sweet Plum, Paris Blue, Summer Sky, Colorbox Wisteria, Berrylicious

Heartfelt Creations Fold Out Cards – 6″ x 6″ Kraft

Flip Fold Album Insert B – White

Prills – Lettuce Celebrate

Viva Decor Stamp Paint – Green

Krystallos Vintage Glass Shards

I hope everyone has a happy, healthy and safe Christmas and Happy Crafting

Patricia


Easel Wedding Card

Welcome back

Today I am featuring an easel wedding card I have made using the Eyelet Oval, Decorative Oval dies and  the Classic Rose stamp and die sets from Heartfelt Creations.

20161204_123941-2

I have been inspired by the lovely white roses that Glenda Brooks has made for Heartfelt Creations here and this is my version of the roses.

20161204_124011-2

I have been wanting to make an easel card for some time and finally made this one and I was happy with how it turned out.  I have used the instructions from this blog post here from the Heartfelt Creations website.

Materials used:

Cardstock – CTMH White Daisy, Timbrels white cardstock

Stamps – Heartfelt Creations Classic Rose, Classic Message

Dies – Heartfelt Creations Eyelet Oval, Decorative Oval, Classic Rose, Spellbinders Labels Eighteen

Inks – Memento New Sprout, Versamark

Embossing powders – Stampendous Aged Ivory, Ranger Gold

I hope you have a good week and Happy Crafting.

Patricia


Heartfelt Creations Sweet Lullaby and Classic Roses

Welcome back

This week I will be featuring a card that I have finally got out of my head.  I have been wanting to use clear acetate or cardstock in a card for some time and it has taken a while for it to come together and today I finished it!

20161124_160957

I love the whimsical nature of the Sweet Lullaby papers and I am sad to see they have retired but not before I managed to grab some packs.

The inside of the card:

20161124_162841_001

Details of the flowers on the top:

20161124_161002

Details on the bottom of the acetate:

20161124_161008

Side views of the card:

20161124_161249

20161124_161305

To make card:

  1. I have cut a piece of cardstock 6″ x 8 1/2″ and scored the long side at 6″ to create the fold of 2 1/2″ for the front.
  2. I have used a 6″ x 6″ corner of one of the scrapbooking sheets from the paper collection on the base of the 6″ x 6″ card.
  3. To cover the top of the card I have used and cut 2 1/2″ of the front the card.
  4. I cut a 2 1/2″ x 6″ piece of patterned paper to place over the top of the cardstock to decorate it.
  5. I then cut a piece of 6″ x 6″ acetate and glued it on the back of the front of the card.
  6. To cover the glue I have used another piece of 2 1/2″ x 6″ patterned paper as shown above.
  7. I used the border and corner dies from the Fleur Borders and Pockets die set and used spray adhesive on the back to adhere to the acetate.  It does not show through the clear cardstock.
  8. I have used the Regal Borders and Pockets die on the top.
  9. To decorate I have used the Classic Rose and Classic Rose Vine die and stamp set along with the gorgeous small flowers from the Birds and Blooms set.


Materials used:

Cardstock – CTMH Colonial White, Timbrels White Cardstock, Bazzill White Smooth Cardstock, Clear Cardstock

Papers – HC Sweet Lullaby

Stamps – HC Classic Rose, Classic Rose Vine, Birds and Bloom

Dies – HC Classic Rose, Classic Rose Vine, Regal Borders and Pockets, Fleur Borders and Pockets, Birds and Bloom Leafy Branch

Inks – Memento Angel Pink, Bamboo Leaves, Canteloupe, Versamark

Embossing Powders – Stampendous Aged Ivory

Pearls from my stash

Flower stamens from my stash.

I am very happy with how it turned out and I hope that you like it too.  This is my second card made like this and I am going to do the first card with some images from the Pampered Pooch collection.  I am looking forward to having some fun with the dogs!

Have a good week and happy crafting.

Patricia