Floral Birdcage

Kia Ora and Welcome Back

I am so excited to see that Heartfelt Creations has released foam paper for making flowers and there is such a fabulous range of stamens to choose from to add to the centre of the flowers.  When I saw this gorgeous birdcage from Imagine Iheartfeltcreations.us/…/debuting-art-foam-paper-and-flower-stamensf I knew that I had to make it with these flowers and I was very happy at how it turned out.  Luckily the Christmas Shop had opened just down the road and I was able to get the birds to finish it off.

For more tips on creating with the foam paper & stamens, watch the tutorial at https://youtu.be/Oma6ctVmUD0.

Materials Used:

HCPC-3752 Classic Rose Stamp

HCD1-7110 Classic Rose die

HCPC-3720 Sunrise Lily stamp

HCD1-787 Sunrise Lily die

HCPC-3656 Delightful Daisies stamp

HCD1-760 Delightful Daisies die

HCPC-3769 Wildwood Florals stamp

HCD1-7125 Wildwood Florals dies

HCPC-3545 Open Leaf stamp

HCD1-736 Classic Leaf die

TSSZ22 Stazon Cherry Pink

TSMP103 Memento Canteloupe ink

TSMP7054 Memento New Sprout ink

71026 Colorbox Lime Pastel ink

TSBL32 Brilliance Pearlescent Coral ink

HCST1-401 Deluxe Flower Shaping Kit

HCS1-459-4 Rock Candy Small

HCS1-459-1 Pastel Pearl Small

HCS1-4593 Pastel Bead Medium

HCFS1-465 Art Foam Paper

HCST1-401 Deluxe Flower Shaping Kit

Others – Hot Glue Gun, Pearls, Voodoo Molly Vintage Paint – Antique White, Imagine If…Bird Cage, Cream Rosette Ribbon, Birds, Stazon Forest Green, Brilliance Blue Sky

Instructions:

Assemble the birdcage as per instructions.  Apply 3 coats of the Voodoo Molly Vintage paint and allow to dry.  Apply pearls around the top and on the middle as shown.  Apply pearls to the centre of the rosette flowers on the ribbon and adhere around the top and bottom as shown using Dries Clear Glue.

To make the leaves stamp the images from the HCPC-3545 Open Leaf stamp set in Stazon Forest Green onto the foam paper and die cut.  Colour with Lime Pastel ink, heat and shape using the flower shaping tools.  Adhere to the birdcage from the top over to the right of the bird cage opening with the hot glue gun.

To make the roses stamp the images from the HCPC-3752 Classic Rose Stamp in Stazon Cherry Pink on the foam paper and die cut with the coordinating die.  Sponge the centres with Canteloupe ink and lightly sponge the outer petals with Pearlescent Coral.  Heat and shape using the flower shaping tools.  Add a stamen from the HCS1-459-3 Pastel Bead Medium set to the centre of the smallest petal and using a hot glue gun make a bud.  Add the next size up petal and adhere with the hot glue gun.  Add more layers of petals to make bigger roses as shown

To make the Lilies stamp the images from the HCPC-3720 Sunrise Lily stamp set on foam paper with Black Cherry ink and die cut with the coordinating dies.  Colour the flowers with Pearlescent Coral, heat and shape by twisting the petals and using the flower shaping tools.  Add the stamens from HCS1-459-4 Rock Candy Small to the centres of the flowers and add the flowers to the birdcage as shown with a hot glue gun.  To make the leaves stamp the leaf image with Forest Green ink and die cut with the coordinating die.  Colour the leaf with Lime Pastel ink, heat and shape using the flower shaping tools.  Add around the flowers with the hot glue glun.

To make the daisy leaves stamp the images from the HCPC-3656 Delightful Daisies stamp set using Forest Green on the foam paper and die cut with the coordinating die.  Colour the leaves with Lime Pastel, heat and shape using the flower shaping tools.  Add to the sides of the doorway of the birdcage using a hot glue gun.

To make the daisies stamp the images from the HCPC-3656 Delightful Daisies stamp set in New Sprout on the foam paper and die cut with the coordinating die.  Heat and shape the flowers using the flower shaping tools.  Add the stamens from the HCS1-459-1 Pastel Pearl Small set and then adhere to the sides of the birdcage with the hot glue gun.

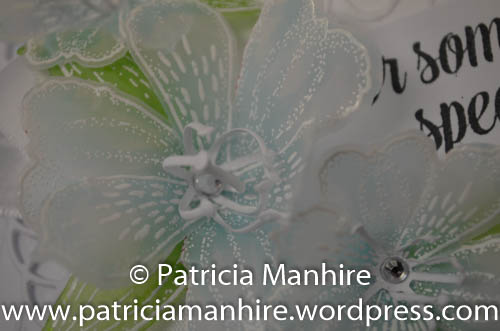
To make the little forget-me-knot flowers stamp the images from the HCPC-3769 Wildwood Florals stamp set in Pearlescent Blue Sky ink on foam paper and die cut with the coordinating die.  Very lightly sponge the edges with the Pearlescent Blue Sky ink, heat and shape using the flower shaping too.  Adhere two flowers together and add a stamen from the HCS1-459-3 Pastel Bead Medium set to the centre.  Trim the stamens and adhere around the base of the birdcage as shown with a hot glue gun.Add the birds as shown with the hot glue gun.

I had a lot of fun with the foam and stamens and I hope that you have fun with them too.

Happy Crafting

Ka Kite Anu

Patricia

Pink Sunrise Lilies

Kia Ora and Welcome Back

Today I am featuring something a little different from my usual cards.  I have been inspired by John Lockwood and his amazing creations.  Please visit his website here for the instructions on how to make this hexagonal frame here: http://johnnextdoor.blogspot.co.nz/2014/05/what-difference-year-makes.html?spref=pi

I have made the lilies using the Heartfelt Creations Sunrise Lily stamps and dies on foamiran.  I was happy with how the flowers turned out but foamiran is still a work in progress for me.

For the base of this I have used Sizzix hexagonal dies rather than measuring out the hexagons as John as done.  I embossed the smaller die and then cut the hexagon with the larger die.  I have still cut the tabs etc the same as what John has done but I thought this was a quicker and easier way of doing the base and it worked perfectly for me.  However, it is really important when cutting out the larger die size to measure with your ruler to make sure the edges are even to allow the base to sit evenly.

Have a good week – don’t forget to check in on Wednesday for the exciting release of the new Beary Fun Retreat Collection from Heartfelt Creations!

Ka Kite Anu

Patricia

Sunrise Lilies Gift Box

Kia Ora and welcome back.

Today is Inspiration Wednesday at Heartfelt Creations and I have a wee gift box to share with you.  Please check out the other stunning creations on the Heartfelt Creations blog here: https://www.heartfeltcreations.us/blog/588/25-elegant-card-scrapbook-and-mixed-media-ideas-for-all-occasions

I love this little die set from Heartfelt Creations that came out last year with the Christmas collections.  It is not just for Christmas but all year round and I have used the gorgeous Sunrise Lily collection to make this box.  

Materials used:

HCDP1-263 Sunrise Lily Paper Collection

HCD1-7108 Snow Kissed Flakes and Tags Die

HCD1-7109 Gift Box and Mini Snowflakes Die

HCP1-3720 Sunrise Lily Cling Stamp

HCD1-787 Sunrise Lily Die

HCD1-782 Sunrise Lily Bouquet Die

HCD1-745 Luggage and Tags Die

TSMP704 Memento New Sprout Ink

TSMP706 Memento Pistachio

TSMP103 Memento Canteloupe

TSBL32 Brilliance Pearlescent Coral

196 Lion’s Mane Ultrafine Transparent Glitter

HCST1-410 Deluxe Flower Shaping Kit

HCDA2-450 Stack and Store Daubers

159723 Art Glitter Dries Clear Adhesive

352854 Metal tips

PGM15016 Rajni Chawla’s Frosting Powder

Other products – Die Cutting Machine

Instructions:

To make the gift box die cut the base of the gift box with the HCD1-7109 Gift Box and Mini Snowflakes Die out of the green paper and assemble using Dries Clear glue. Die cut the front and back tags with the HCD1-7109 Gift Box and Mini Snowflakes Die out of the pink patterned paper and adhere to the front and back of the gift box.

Die cut the vase from the patterned paper and adhere to the front of the box.

For more information about making the Sunrise Lily flowers please click here: https://www.youtube.com/watch?v=9GxqgadNKNE

To make the lilies stamp the flower images from the HCP1-3720 Sunrise Lily Cling Stamp with the Pearlescent Coral ink and the leaves with Pistachio ink. Die cut with the coordinating die. Lightly sponge the centre of the flowers with Canteloupe and sponge the edges of the flowers with Coral ink.  Shape the flowers and assemble.  Sponge the leaves with New Sprout and sponge the edges with Pistachio and adhere to the lilies.

Using Dries Clear glue add Frosting Powder to the flowers and heat to set.

Add the flowers to the front of the gift box as shown.  Die cut the tag using the HCD1-745 Luggage and Tags Die and adhere under the flowers as shown.

Happy Crafting

Ka Kite Anu

Patricia

Time for Tea?

Welcome back.

I am so excited and humbled to announce that I have been chosen as a semi-finalist for the Heartfelt Creations Design Team.  I have been paper crafting for over 20 years and the Heartfelt Creations products are simply the best that I have used.  The papers are gorgeous and it is so easy to create a beautiful card with little effort. The stamps give a nice clean and crisp image and the coordinating dies cut with ease.  Put them all together and you can create amazing artwork.

I would be honoured if you would vote for me here: https://www.heartfeltcreations.us/blog/538/21-joyful-springtime-paper-crafting-ideas-sneak-peek-2017-design-team-semifinalists-announced

Here is a 3D project that I submitted as part of my application for the team.  I really enjoy making these projects as it is good to challenge myself and do something really different!

For this teapot and teacup I have used an SVG file from svgcuts.com.  I find their files extremely easy to use and there is minimal preparation with them and it takes longer to work out my cardstock and papers I am going to use.

2017-02-17-17-57-33

Materials Used:

Cardstock – CTMH Colonial White, Timbrels White Cardstock, Heavy Chocolate

Paper – Sunrise Lily

Stamps – Sunrise Lily

Dies – Sunrise Lily

Inks – Memento Canteloupe, Morocco, Tangelo, New Sprout, Bamboo Leaves, Tuxedo Black

Deluxe Shaping Kit

SVG from svgcuts.com

Art Glitter Ultrafine glitter – Lion’s Mane

Spectrum Noir Sparkle Clear Overlay Marker

Art Glitter Dries Clear adhesive

Instructions:

Cut the teapot and teacup using the svg file from svgcuts.com.  I have used the Colonial White as the base and used the Sunrise Lily pink patterned paper to decorate the teapot and cup.

To make the flowers stamp using the Tuxedo Black ink and die cut.  Sponge the centres of the lilies with Canteloupe and the outside with Tangelo.  Brush the edges with Morocco ink for more depth.  Cut the stamens using the Chocolate cardstock.  Using the Deluxe Shaping Kit shape the flowers and assemble them following these instructions from Emma Lou here: https://www.youtube.com/watch?v=kWpNGmM7LjA&t=44s.

Cut the stamens out of the chocolate cardstock and curl them using using the shaping tool. Dot some Art Glitter Dries Clear adhesive on the tips of the stamens and dip into the Art Glitter Ultrafine Lions Mane glitter and once dry adhere them to the centre of the flowers.  Paint the petals with the Spectrum Noir Clear Sparkle overlay.

Arrange the flowers around the teapot and teacup as shown.

Add a triple bow using the organza ribbon on the teapot and another double bow on the spoon and adhere a small lily on top.

Happy Crafting

Patricia

A Heartfelt Wedding Project

Welcome back

Last week I took Gift Hutt to the Wellington Wedding Show showcasing some beautiful products in the shop.   So I took the opportunity to showcase the beautiful Sunrise Lilies from Heartfelt Creations with this decorated box made to look like a wedding cake.  I have made the lilies out of vellum and coloured the back of the flowers with copic markers.

2016-05-04 15.39.34

2016-05-04 15.40.35


Here are some closeups of the flowers.  As you can see I have added a touch of bling to the centre of the flowers.

2016-05-04 15.41.06

The materials I have used are:

Cardstock – Wedding Neutrals paper pack from Craft Smith, CTMH White Daisy

Vellum

Ink – Versamark

Embossing Powder – Ranger White

Dies – Heartfelt Creations Eyelet Oval, Sunrise Lily, Regal Borders and Pockets

Stamp – Heartfelt Creations Sunrise Lily

Embossing Folder – Couture Creations Tied Together

Copic marker Y08 Yellow

Clear sparkles from CTMH

Ribbon from my stash

Have a good week and Happy Crafting

Patricia


A Heartfelt Wish for Mothers Day

Welcome back

I am on a roll with these beautiful Sunrise Lily stamps and dies from Hearttfelt Creation.  I have made some beautiful and vibrant flowers and a chance remark yesterday at my class led to me experimenting with some vellum.  I am thrilled how they turned out.

I embossed the flowers with white embossing ink on the vellum and then die cut the flowers out.  I coloured on the back of the flowers with copic markers and then shaped them with the same technique as used with cardstock.  I was pleasantly surprised how easy they were to shape and put together.  I love the softness of the colours and the white stamens looked beautiful inside the flowers.  Of course I had to add a little bling to the centres of the flowers.

My first card has been inspired by the very cute winking frog card from Heartfelt Creations.

2016-04-25 15.43.52

My second card could be used for Mothers Day or any other special occasion.  I enjoy mixing and matching embossing effects.

2016-04-25 15.51.32

Here are some closeups of the flowers.

2016-04-25 15.56.35

2016-04-25 15.56.52

2016-04-25 15.57.03

Materials used:

Cardstock – CTMH White Daisy, Sweet Leaf

Stamps – HC Sunrise Lily, CTMH Just to Say… Cricut Collection, Shower Flowers

Dies – HC Sunrise Lily, Eyelet Oval, Regal Borders and Pockets

Copic Markers – BG01 Aqua Blue, G99 Olive

Inks – Memento Tuxedo Black, Olive Grove

Embossing Folders – CTMH – Lines, Couture Creations Baroque

Ribbon from my stash

CTMH Sparkles.

These cards will be available for sale at Gift Hutt.

Have a great week and Happy Crafting.

Patricia

Beautiful Sunrise Lilies

Welcome back

Just a quick post showing you my creation using Heartfelt Creations Sunrise Lily flowers on a book card.  This is my first effort at using this svg file from Forever Memories that I have cut on my Cricut Explore and I will be changing a few things next time such as shaping the card a bit more and using foam dots for more dimension.

#HeartfeltCreations #ForeverMemories

Materials used:

Cardstock – American Crafts, CTMH Colonial White, White Daisy

Stamps – Heartfelt Creations Sunrise Lily

Die – Heartfelt Creations Sunrise Lily

Inks – CTMH Creme Brulee, Sorbet, Fern, Sweet Leaf, Blush

SVG file from Forever Memories For You

I am in the process of sourcing new inks as I am finding the CTMH inks fade very quickly in the sun in the window of the shop.

This card is for sale at Gift Hutt here.

Happy Crafting.

Patricia


Heartfelt Creations Sunrise Lilies

Welcome back.

I apologise for no posts for the last few weeks but we have been without an internet or phone line since we moved four weeks ago.

This week I am featuring three cards that I have made using the gorgeous Heartfelt Creations Sunrise Lily set that I will be doing in an upcoming class at Gift Hutt on April 24th at 2 pm.  All materials will be provided and pre-cut to allow you to spend more time on creating the beautiful flowers.  There will be a choice of colours and papers for you to choose from and a range of inks, pens, paints and colour pencils to choose from to colour in the images.2016-04-10 17.13.13

2016-04-10 17.13.33

2016-04-10 17.13.58

For further details and to book your place please clink on this link Gift Hutt Workshops.  Card kits are available if you are not able to make it to the class.

Have a good week and Happy Crafting

Patricia